| Deploy YOLOv8 on NVIDIA Jetson using TensorRT and DeepStream SDK | 您所在的位置:网站首页 › jetson inference › Deploy YOLOv8 on NVIDIA Jetson using TensorRT and DeepStream SDK |
Deploy YOLOv8 on NVIDIA Jetson using TensorRT and DeepStream SDK
|
Deploy YOLOv8 on NVIDIA Jetson using TensorRT and DeepStream SDK This guide explains how to deploy a trained AI model into NVIDIA Jetson Platform and perform inference using TensorRT and DeepStream SDK. Here we use TensorRT to maximize the inference performance on the Jetson platform.  PrerequisitesUbuntu Host PC (native or VM using VMware Workstation Player)reComputer Jetson or any other NVIDIA Jetson device running JetPack 4.6 or higherDeepStream Version Corresponsing to JetPack Version PrerequisitesUbuntu Host PC (native or VM using VMware Workstation Player)reComputer Jetson or any other NVIDIA Jetson device running JetPack 4.6 or higherDeepStream Version Corresponsing to JetPack VersionFor YOLOv8 to work together with DeepStream, we are using this DeepStram-YOLO repository and it supports different versions of DeepStream. So make sure to use the correct version of JetPack according to the correct version of DeepStream. DeepStream VersionJetPack Version6.25.16.1.15.0.26.15.0.1 DP6.0.14.6.34.6.24.6.16.04.6To verify this wiki, we have installed DeepStream SDK 6.1.1 on a JetPack 5.0.2 system running on Jetson AGX Orin 32GB H01 Kit. At the time of writing this wiki, DeepStream-YOLO only supports DeepStream SDK 6.1.1 which means you need to flash JetPack 5.0.2 on the device. However, Orin NX (reComputer J4012) only supports JetPack 5.1 and above and if you want to test this on Orin NX, you need to emulate Orin NX on the Jetson AGX Orin Dev Kit or AGX Orin 32GB H01 Kit with JetPack 5.0.2. Refer to this detailed guide about emulation to learn more. Flash JetPack to JetsonNow you need to make sure that the Jetson device is flashed with a JetPack system including SDK components such as CUDA, TensorRT, cuDNN and more. You can either use NVIDIA SDK Manager or command-line to flash JetPack to the device. For Seeed Jetson-powered devices flashing guides, please refer to the below links: reComputer J1010 | J101reComputer J2021 | J202reComputer J1020 | A206reComputer J4012 | J401A203 Carrier BoardA205 Carrier BoardJetson Xavier AGX H01 KitJetson AGX Orin 32GB H01 KitInstall DeepStreamThere are multiple ways of installing DeepStream to the Jetson device. You can follow this guide to learn more. However, we recommend you to install DeepStream via the SDK Manager because it can guarantee for a successful and easy installation. Install Necessary PackagesStep 1. Access the terminal of Jetson device, install pip and upgrade itsudo apt updatesudo apt install -y python3-pippip3 install --upgrade pipStep 2. Clone the following repogit clone https://github.com/ultralytics/ultralytics.gitStep 3. Open requirements.txtcd ultralyticsvi requirements.txtStep 4. Edit the following lines. Here you need to press i first to enter editing mode. Press ESC, then type :wq to save and quit# torch>=1.7.0# torchvision>=0.8.1Note: torch and torchvision are excluded for now because they will be installed later. Step 5. Install the necessary packagespip3 install -r requirements.txtIf the installer complains about outdated python-dateutil package, upgrade it by pip3 install python-dateutil --upgradeInstall PyTorch and TorchvisionWe cannot install PyTorch and Torchvision from pip because they are not compatible to run on Jetson platform which is based on ARM aarch64 architecture. Therefore we need to manually install pre-built PyTorch pip wheel and compile/ install Torchvision from source. Visit this page to access all the PyTorch and Torchvision links. Here are some of the versions supported by JetPack 5.0 and above. PyTorch v1.11.0 Supported by JetPack 5.0 (L4T R34.1.0) / JetPack 5.0.1 (L4T R34.1.1) / JetPack 5.0.2 (L4T R35.1.0) with Python 3.8 file_name: torch-1.11.0-cp38-cp38-linux_aarch64.whl URL: https://nvidia.box.com/shared/static/ssf2v7pf5i245fk4i0q926hy4imzs2ph.whl PyTorch v1.12.0 Supported by JetPack 5.0 (L4T R34.1.0) / JetPack 5.0.1 (L4T R34.1.1) / JetPack 5.0.2 (L4T R35.1.0) with Python 3.8 file_name: torch-1.12.0a0+2c916ef.nv22.3-cp38-cp38-linux_aarch64.whl URL: https://developer.download.nvidia.com/compute/redist/jp/v50/pytorch/torch-1.12.0a0+2c916ef.nv22.3-cp38-cp38-linux_aarch64.whl Step 1. Install torch according to your JetPack version in the following formatwget -O pip3 installFor example, here we are running JP5.0.2 and therefore we choose PyTorch v1.12.0 sudo apt-get install -y libopenblas-base libopenmpi-devwget https://developer.download.nvidia.com/compute/redist/jp/v50/pytorch/torch-1.12.0a0+2c916ef.nv22.3-cp38-cp38-linux_aarch64.whl -O torch-1.12.0a0+2c916ef.nv22.3-cp38-cp38-linux_aarch64.whlpip3 install torch-1.12.0a0+2c916ef.nv22.3-cp38-cp38-linux_aarch64.whlStep 2. Install torchvision depending on the version of PyTorch that you have installed. For example, we chose PyTorch v1.12.0, which means, we need to choose Torchvision v0.13.0sudo apt install -y libjpeg-dev zlib1g-devgit clone --branch v0.13.0 https://github.com/pytorch/vision torchvisioncd torchvisionpython3 setup.py install --userHere is a list of the corresponding torchvision version that you need to install according to the PyTorch version: PyTorch v1.11 - torchvision v0.12.0PyTorch v1.12 - torchvision v0.13.0If you want a more detailed list, please check this link. DeepStream Configuration for YOLOv8Step 1. Clone the following repocd ~git clone https://github.com/marcoslucianops/DeepStream-YoloStep 2. Copy gen_wts_yoloV8.py from DeepStream-Yolo/utils into ultralytics directorycp DeepStream-Yolo/utils/gen_wts_yoloV8.py ultralyticsStep 3. Inside the ultralytics repo, download pt file from YOLOv8 releases (example for YOLOv8s)wget https://github.com/ultralytics/assets/releases/download/v0.0.0/yolov8s.ptNOTE: You can use your custom model, but it is important to keep the YOLO model reference (yolov8_) in your cfg and weights/wts filenames to generate the engine correctly. Step 4. Generate the cfg, wts and labels.txt (if available) files (example for YOLOv8s)python3 gen_wts_yoloV8.py -w yolov8s.ptNote: To change the inference size (defaut: 640) -s SIZE--size SIZE-s HEIGHT WIDTH--size HEIGHT WIDTHExample for 1280:-s 1280or-s 1280 1280Step 5. Copy the generated cfg, wts and labels.txt (if generated) files into the DeepStream-Yolo foldercp yolov5s.cfg ~/DeepStream-Yolocp yolov5s.wts ~/DeepStream-Yolocp labels.txt ~/DeepStream-YoloStep 6. Open the DeepStream-Yolo folder and compile the librarycd ~/DeepStream-YoloCUDA_VER=11.4 make -C nvdsinfer_custom_impl_Yolo # for DeepStream 6.1.1 / 6.1CUDA_VER=10.2 make -C nvdsinfer_custom_impl_Yolo # for DeepStream 6.0.1 / 6.0Step 7. Edit the config_infer_primary_yoloV5.txt file according to your model (example for YOLOv8s with 80 classes)[property]...custom-network-config=yolov8s.cfgmodel-file=yolov8s.wts...num-detected-classes=80...Step 8. Edit the deepstream_app_config.txt file...[primary-gie]...config-file=config_infer_primary_yoloV8.txtStep 9. Change the video source in deepstream_app_config.txt file. Here a default video file is loaded as you can see below...[source0]...uri=file:///opt/nvidia/deepstream/deepstream/samples/streams/sample_1080p_h264.mp4Run the Inferencedeepstream-app -c deepstream_app_config.txt The above result is running on Jetson AGX Orin 32GB H01 Kit with FP32 and YOLOv8s 640x640. We can see that the FPS is around 60 and that is not the true FPS because when we set type=2 under [sink0] in deepstream_app_config.txt file, the FPS is limited to the fps of the monitor and the monitor we used for this testing is a 60Hz monitor. However, if you change this value to type=1, you will be able to obtain the maximum FPS, but there will be no live detection output. For the same video source and the same model as used above, after changing type=2 under [sink0], the below result can be obtained.  As you can see, we can get an fps of about 139 which relates to the real fps value. INT8 CalibrationIf you want to use INT8 precision for inference, you need to follow the steps below Step 1. Install OpenCVsudo apt-get install libopencv-devStep 2. Compile/recompile the nvdsinfer_custom_impl_Yolo library with OpenCV supportcd ~/DeepStream-YoloCUDA_VER=11.4 OPENCV=1 make -C nvdsinfer_custom_impl_Yolo # for DeepStream 6.1.1 / 6.1CUDA_VER=10.2 OPENCV=1 make -C nvdsinfer_custom_impl_Yolo # for DeepStream 6.0.1 / 6.0Step 3. For COCO dataset, download the val2017, extract, and move to DeepStream-Yolo folder Step 4. Make a new directory for calibration images mkdir calibrationStep 5. Run the following to select 1000 random images from COCO dataset to run calibrationfor jpg in $(ls -1 val2017/*.jpg | sort -R | head -1000); do \ cp ${jpg} calibration/; \doneNote: NVIDIA recommends at least 500 images to get a good accuracy. On this example, 1000 images are chosen to get better accuracy (more images = more accuracy). Higher INT8_CALIB_BATCH_SIZE values will result in more accuracy and faster calibration speed. Set it according to you GPU memory. You can set it from head -1000. For example, for 2000 images, head -2000. This process can take a long time. Step 6. Create the calibration.txt file with all selected imagesrealpath calibration/*jpg > calibration.txtStep 7. Set environment variablesexport INT8_CALIB_IMG_PATH=calibration.txtexport INT8_CALIB_BATCH_SIZE=1Step 8. Update the config_infer_primary_yoloV8.txt fileFrom ...model-engine-file=model_b1_gpu0_fp32.engine#int8-calib-file=calib.table...network-mode=0...To ...model-engine-file=model_b1_gpu0_int8.engineint8-calib-file=calib.table...network-mode=1...Step 9. Before running the inference, set type=2 under [sink0] in deepstream_app_config.txt file as mentioned before to obtain the max fps performance. Step 10. Run the inference deepstream-app -c deepstream_app_config.txt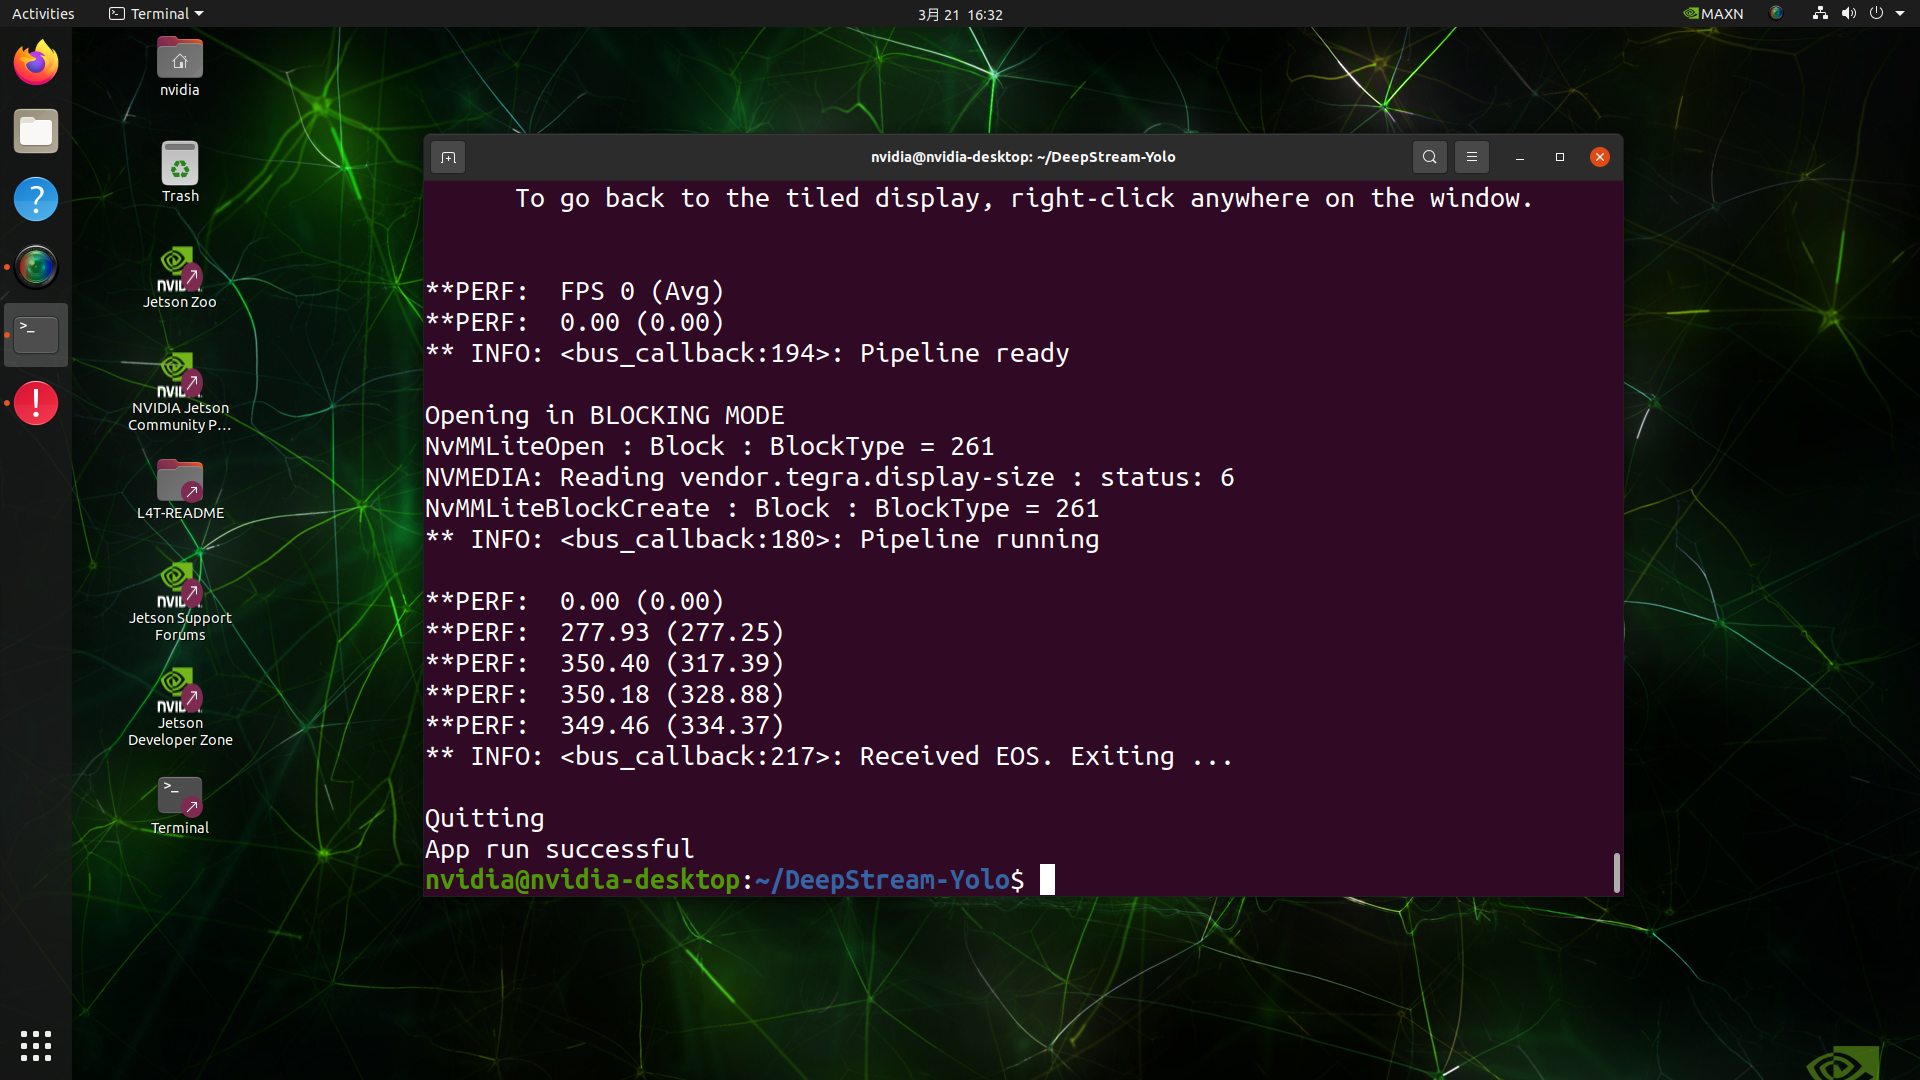 Here we get an FPS value of about 350! trtexec ToolIncluded in the samples directory is a command-line wrapper tool called trtexec. trtexec is a tool to use TensorRT without having to develop your own application. The trtexec tool has three main purposes: Benchmarking networks on random or user-provided input data.Generating serialized engines from models.Generating a serialized timing cache from the builder.Here we can use trtexec tool to quickly benchmark the models with different parameter. But first of all, you need to have an onnx model and we can genrate this onnx model by using ultralytics yolov8. Step 1. Build ONNX using:yolo mode=export model=yolov8s.pt format=onnxStep 1. Build engine file using trtexec as follows:cd /usr/src/tensorrt/bin./trtexec --onnx= --saveEngine=For example: ./trtexec --onnx=/home/nvidia/yolov8s.onnx --saveEngine=/home/nvidia/yolov8s.engineThis will output performance results as follows along with a generated .engine file. By default it will convert ONNX to an TensorRT optimized file in FP32 precision and you can see the output as follows 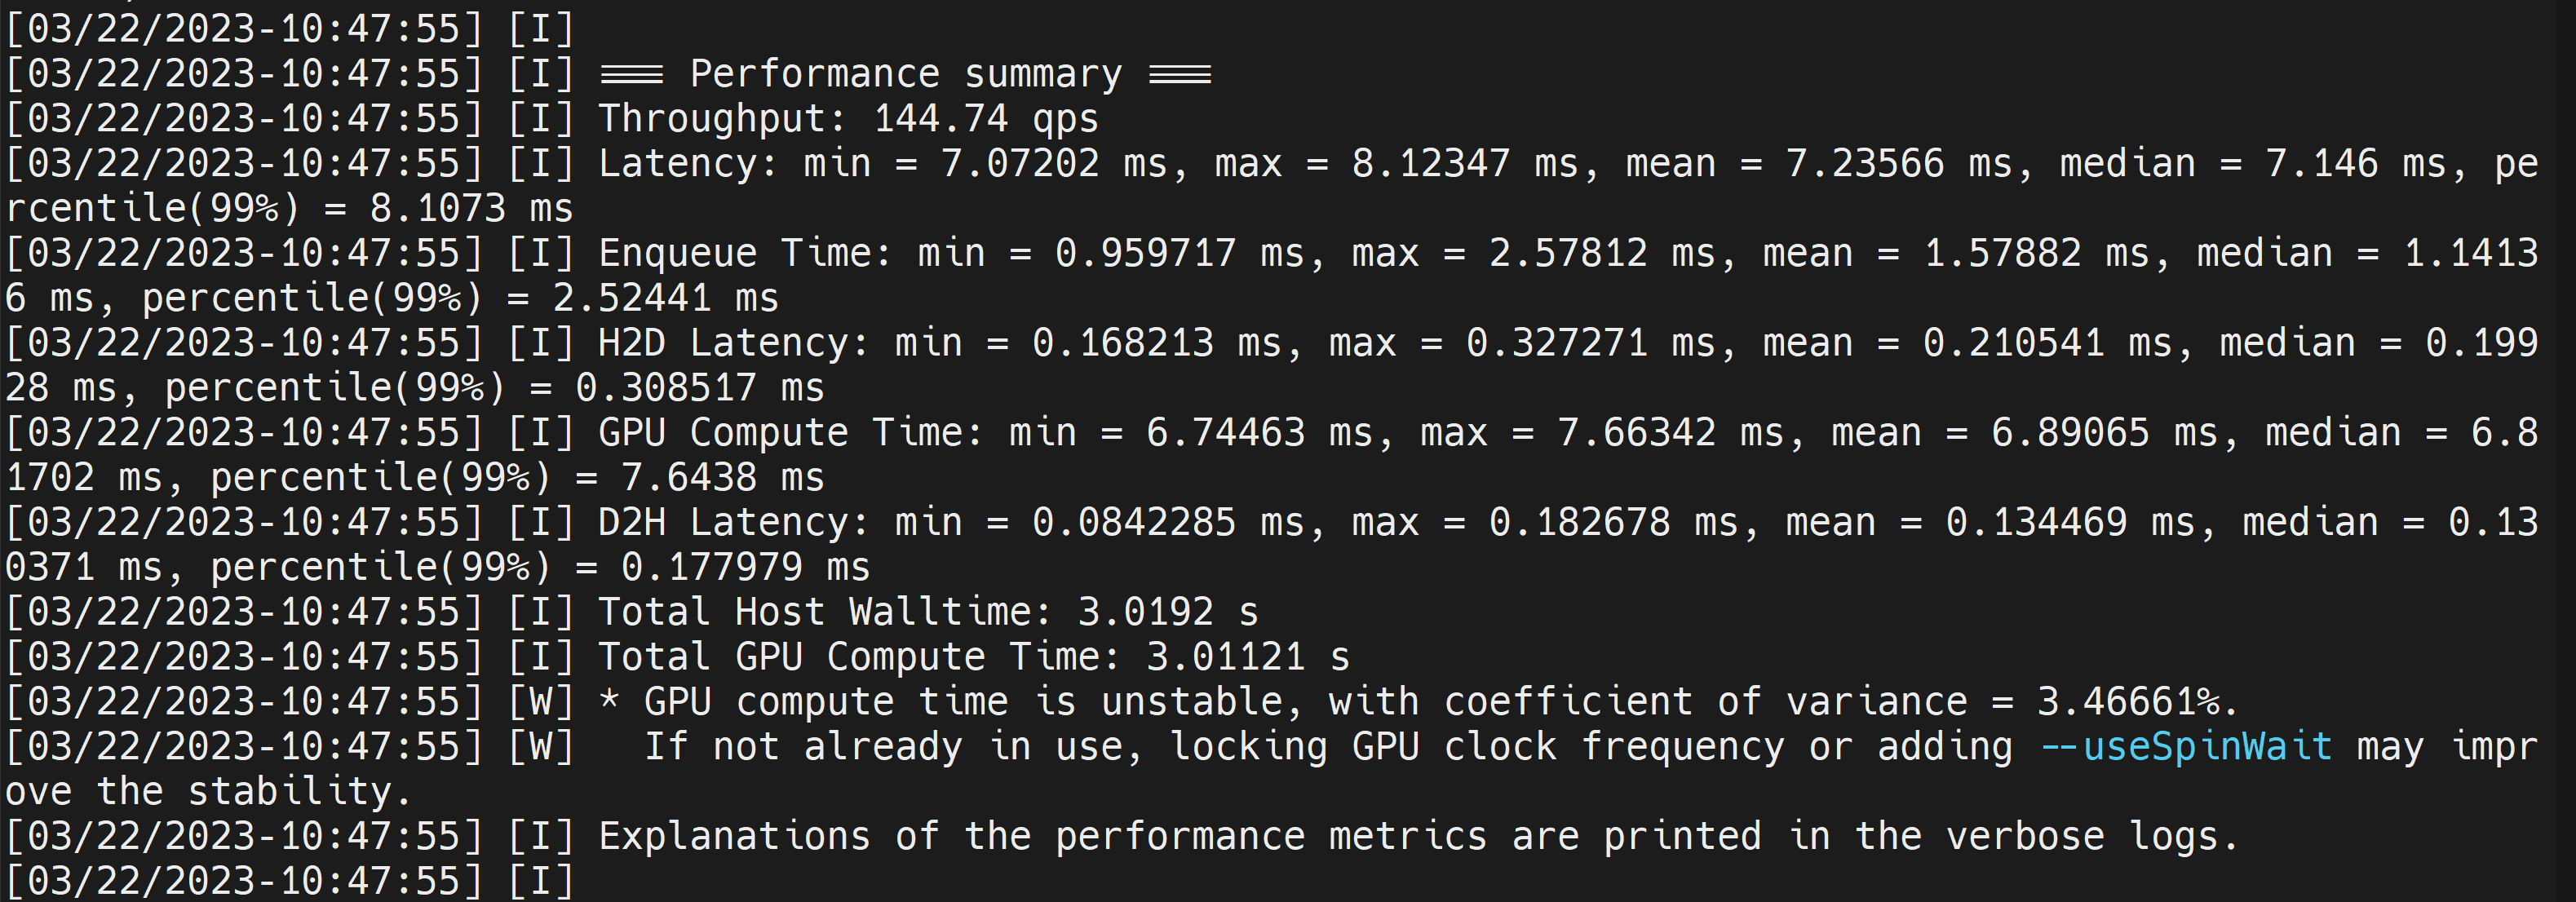 Here we can take the mean latency as 7.2ms which translates to 139FPS. This is the same performance we got in the previous DeepStream demo. However, if you want INT8 precision which offers better performance, you can execute the above command as follows ./trtexec --onnx=/home/nvidia/yolov8s.onnx --saveEngine=/home/nvidia/yolov8s.engine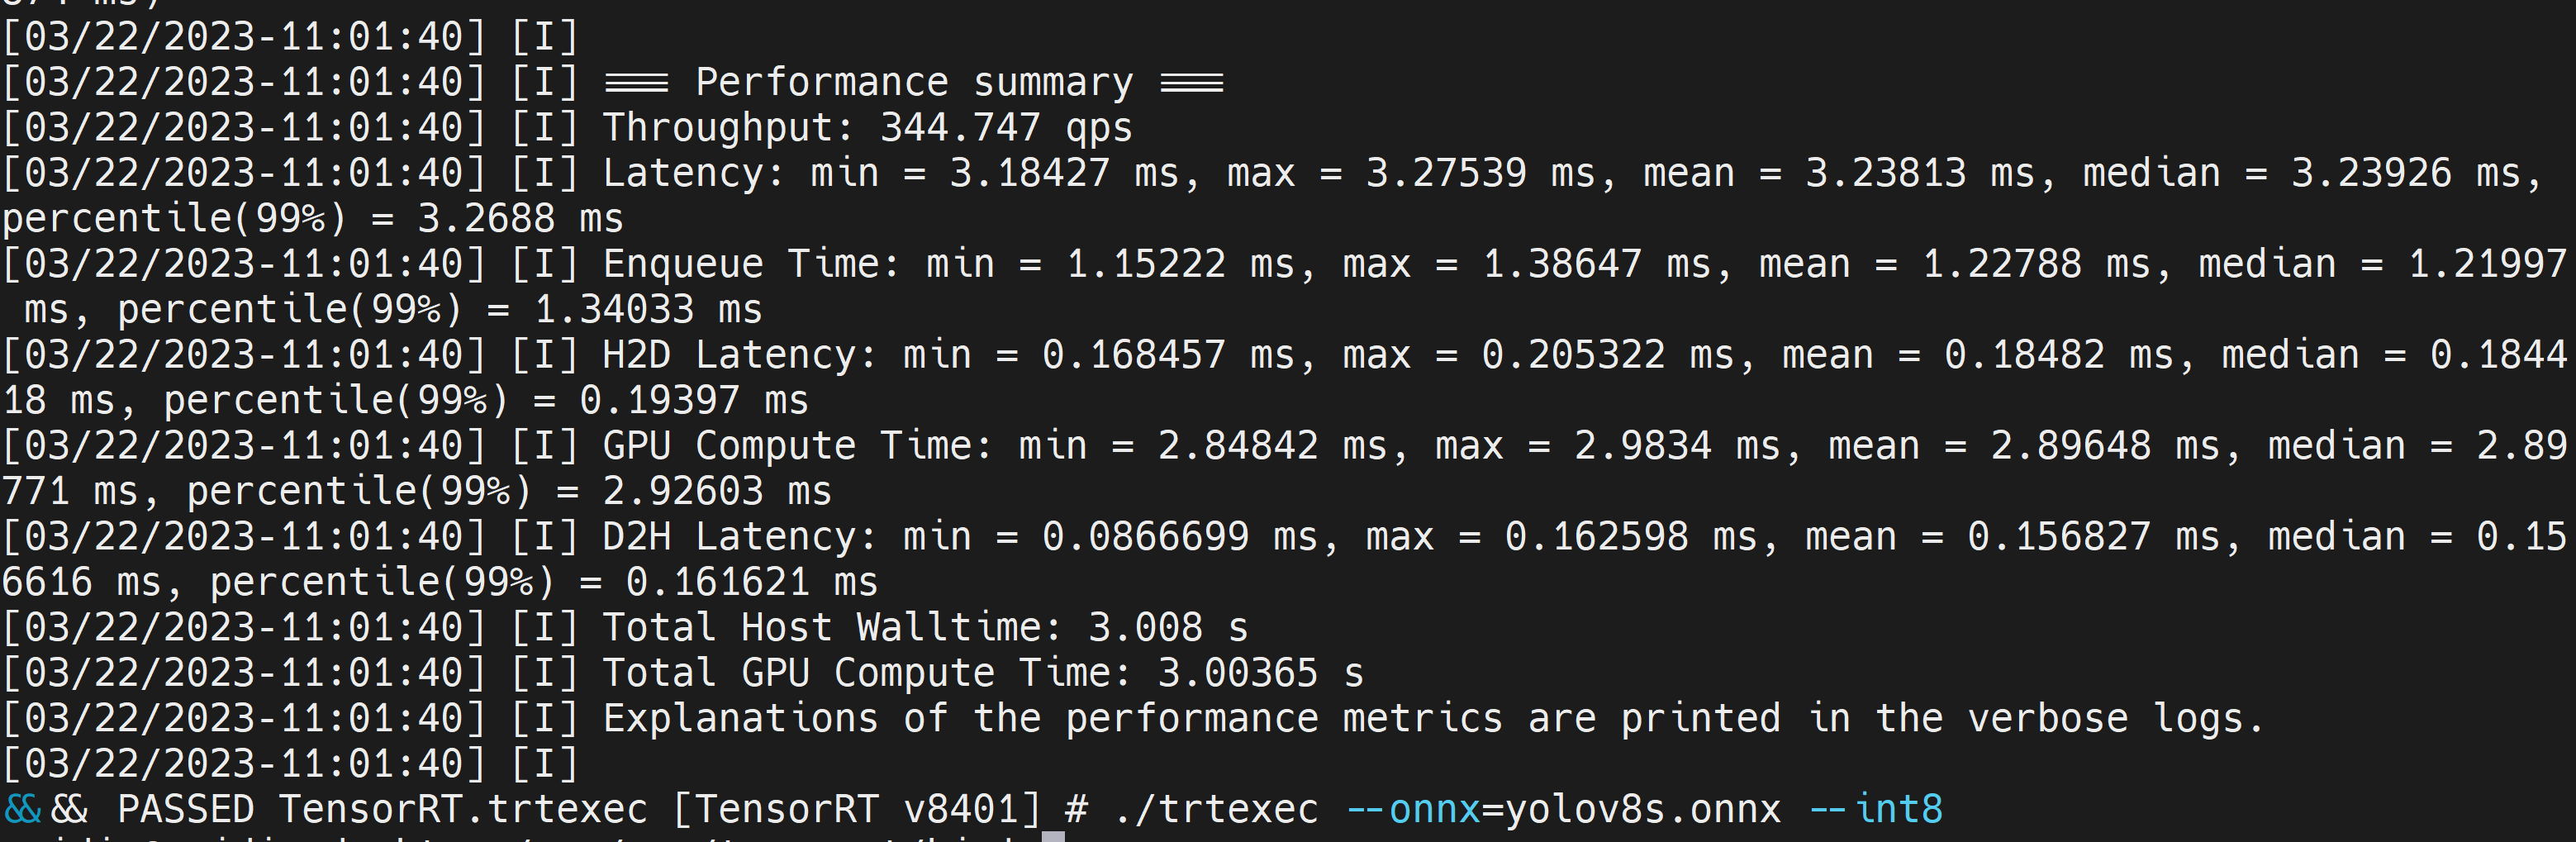 Here we can take the mean latency as 2.9ms which translates to 350FPS. This is the same performance we got in the previous DeepStream demo. Benchmark ResultsThese are some of the performance benchmark results based on our testing on the reComputer J4012 Model Name PrecisionInference Size Inference Time (ms) FPSYOLOv8nwith PyTorch640x640 1856FP328.7115FP16 4.9204INT83.9256YOLOv8s with PyTorch640x640 1953FP3214.967FP16 7.8128INT85.1196YOLOv8m with PyTorch640x640 3826FP3232.531FP16 15.863INT810.893YOLOv8l with PyTorch640x640 6216FP324920FP16 2442INT814.469YOLOv8x with PyTorch640x640 9910FP3279.513FP16 37.926INT821.946ResourcesYOLOv8 documentationTensorRT documentationDeepStream SDK documentationTech SupportPlease submit any technical issue into our forum.
|

【本文地址】